
Kitchen Wisdom Gluten Free Roasted Red Peppers are so easy to prepare! I love roasted peppers. I roast any peppers, including hot little ones; especially during late summer, when the harvest of gardens belonging to friends overflow, I often end up with a wide spectrum. I roast all of them, remove their skins and store them together. I was raised roasting red peppers, Red peppers being my favorite because they are sweet and delicious. They add a gorgeous blast of color to salad, sandwiches, pasta and any other dish you can think of.
To roast peppers you will need:
Clean Red Bell Peppers
Broiler pan
Clean the red peppers and dry them. Turn the broiler on high.
Place the peppers on a broiler pan, or a pan safe for broiling. Place under broiler heat.
Cooking times vary, in all it will take about 25-30 minutes.
After about 5 minutes, use tongs and a heavy pot holder. Pull out the pan and turn peppers to another side (usually there are four turns on a bell pepper).
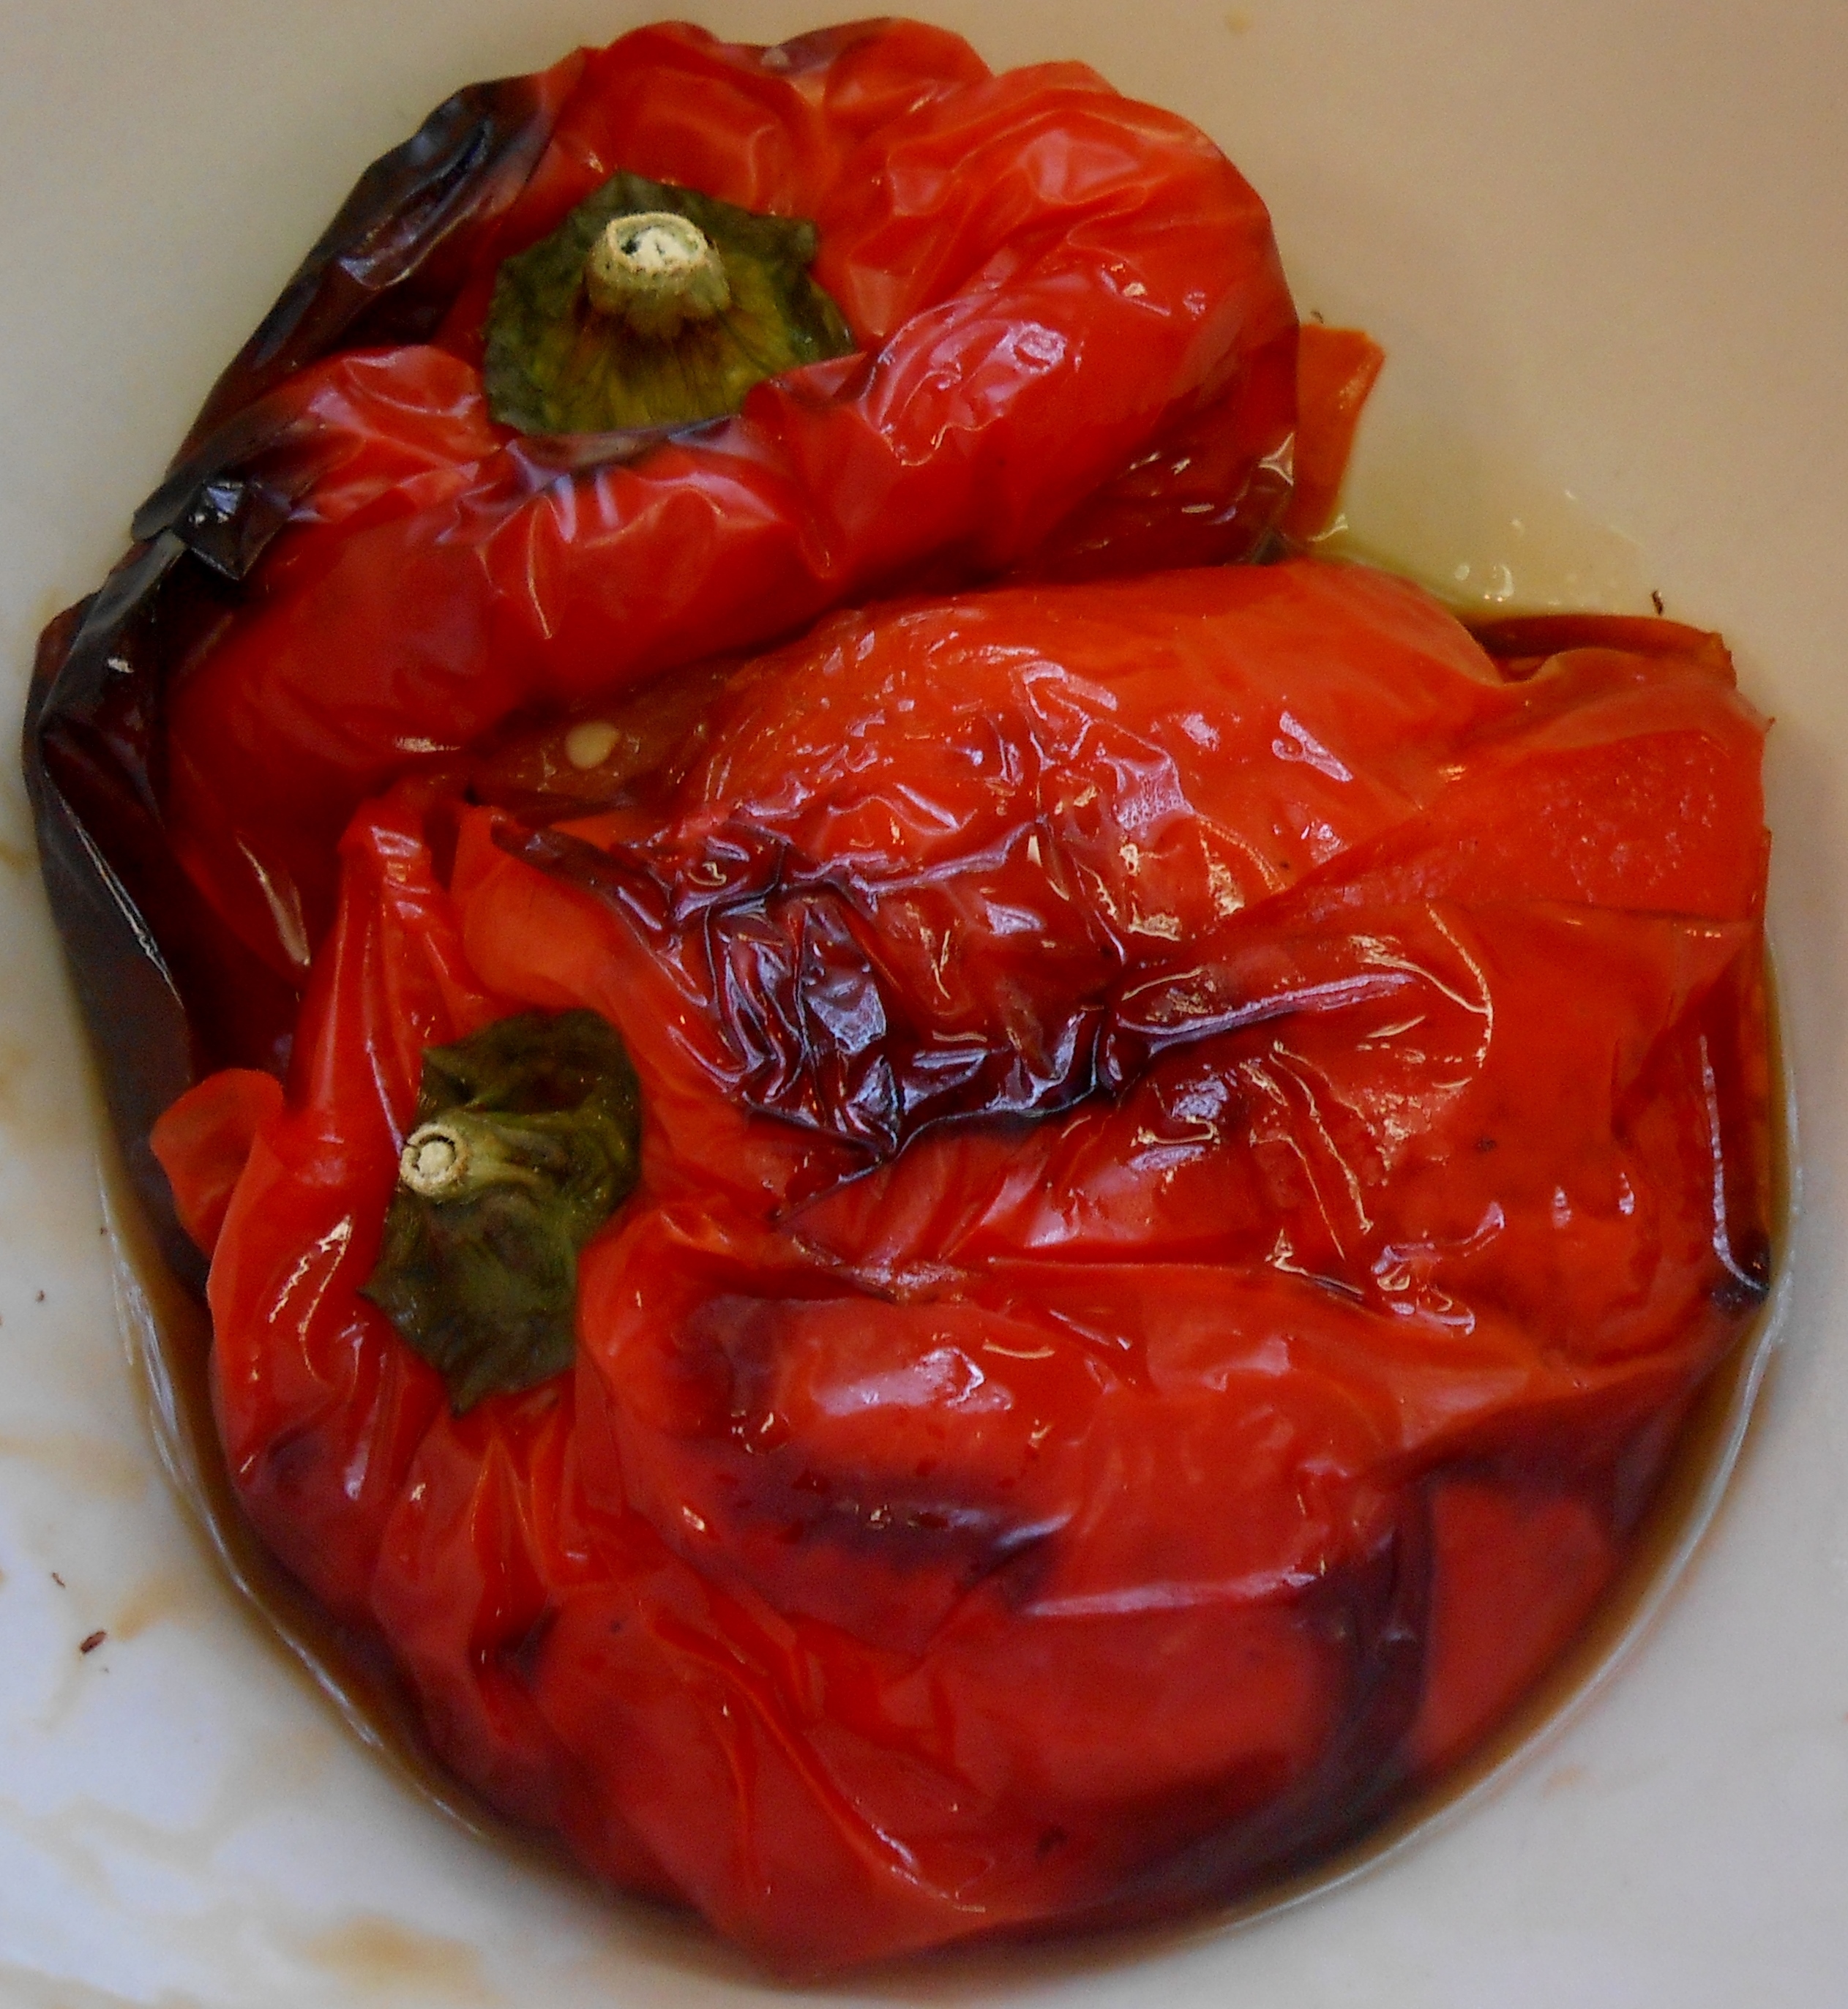
It is time to turn the peppers when charred blisters begin to appear. Don’t worry about any black burn on the skin, that will be addressed after peppers are done. When the entire pepper is blistered and charred, it is done. Different sizes will cook at different rates, keep a watchful eye.
Remove peppers to a large non-reactive bowl. Cover bowl (I know a lot of people are into foil, but I just use a plate a to cover the way I was taught when growing up). The cover will allow steam to build under the skin and will facilitate easier skin removal.
Allow peppers to completely cool, covered.
Once cooled, use the lid plate as the garbage plate for skins and seeds. With your hands, hold one pepper at a time. First remove the core (stem). Allow the liquid to drain into the bowl the peppers are sitting in. Try to keep the liquid as seed free as possible. Remove as many of the seeds as possible and place them on the garbage plate with the core.
Some people run the pepper under water to help remove the skin. I find this removes some of the delicious flavor the juices have accrued during broiling. I remove skins without the use of running water, but the water is useful if you are struggling. The pepper should be just about falling apart in your hand. I go for wherever the skin is obviously blistered and lift it back and off the flesh. Gently pull the skin from the flesh of the pepper. You should find it will lift comfortably, it shouldn’t be a struggle. If it is a struggle, the peppers may have needed to cook longer.
Once the seeds, core and skins have been removed, I gently rip the pepper into long strips with hand. Return to the bowl with the peppers yet to be done.
Once all of the peppers are stripped and torn, they are ready to be eaten, stored or included in another recipe.
To store: place in an airtight jar, drizzle with cold pressed extra virgin olive oil, seal and place in fridge They keep like this for about a week. When I serve them as is, I generally bring them to room temperature and drizzle with olive oil.
Sautéed Roasted Red Peppers
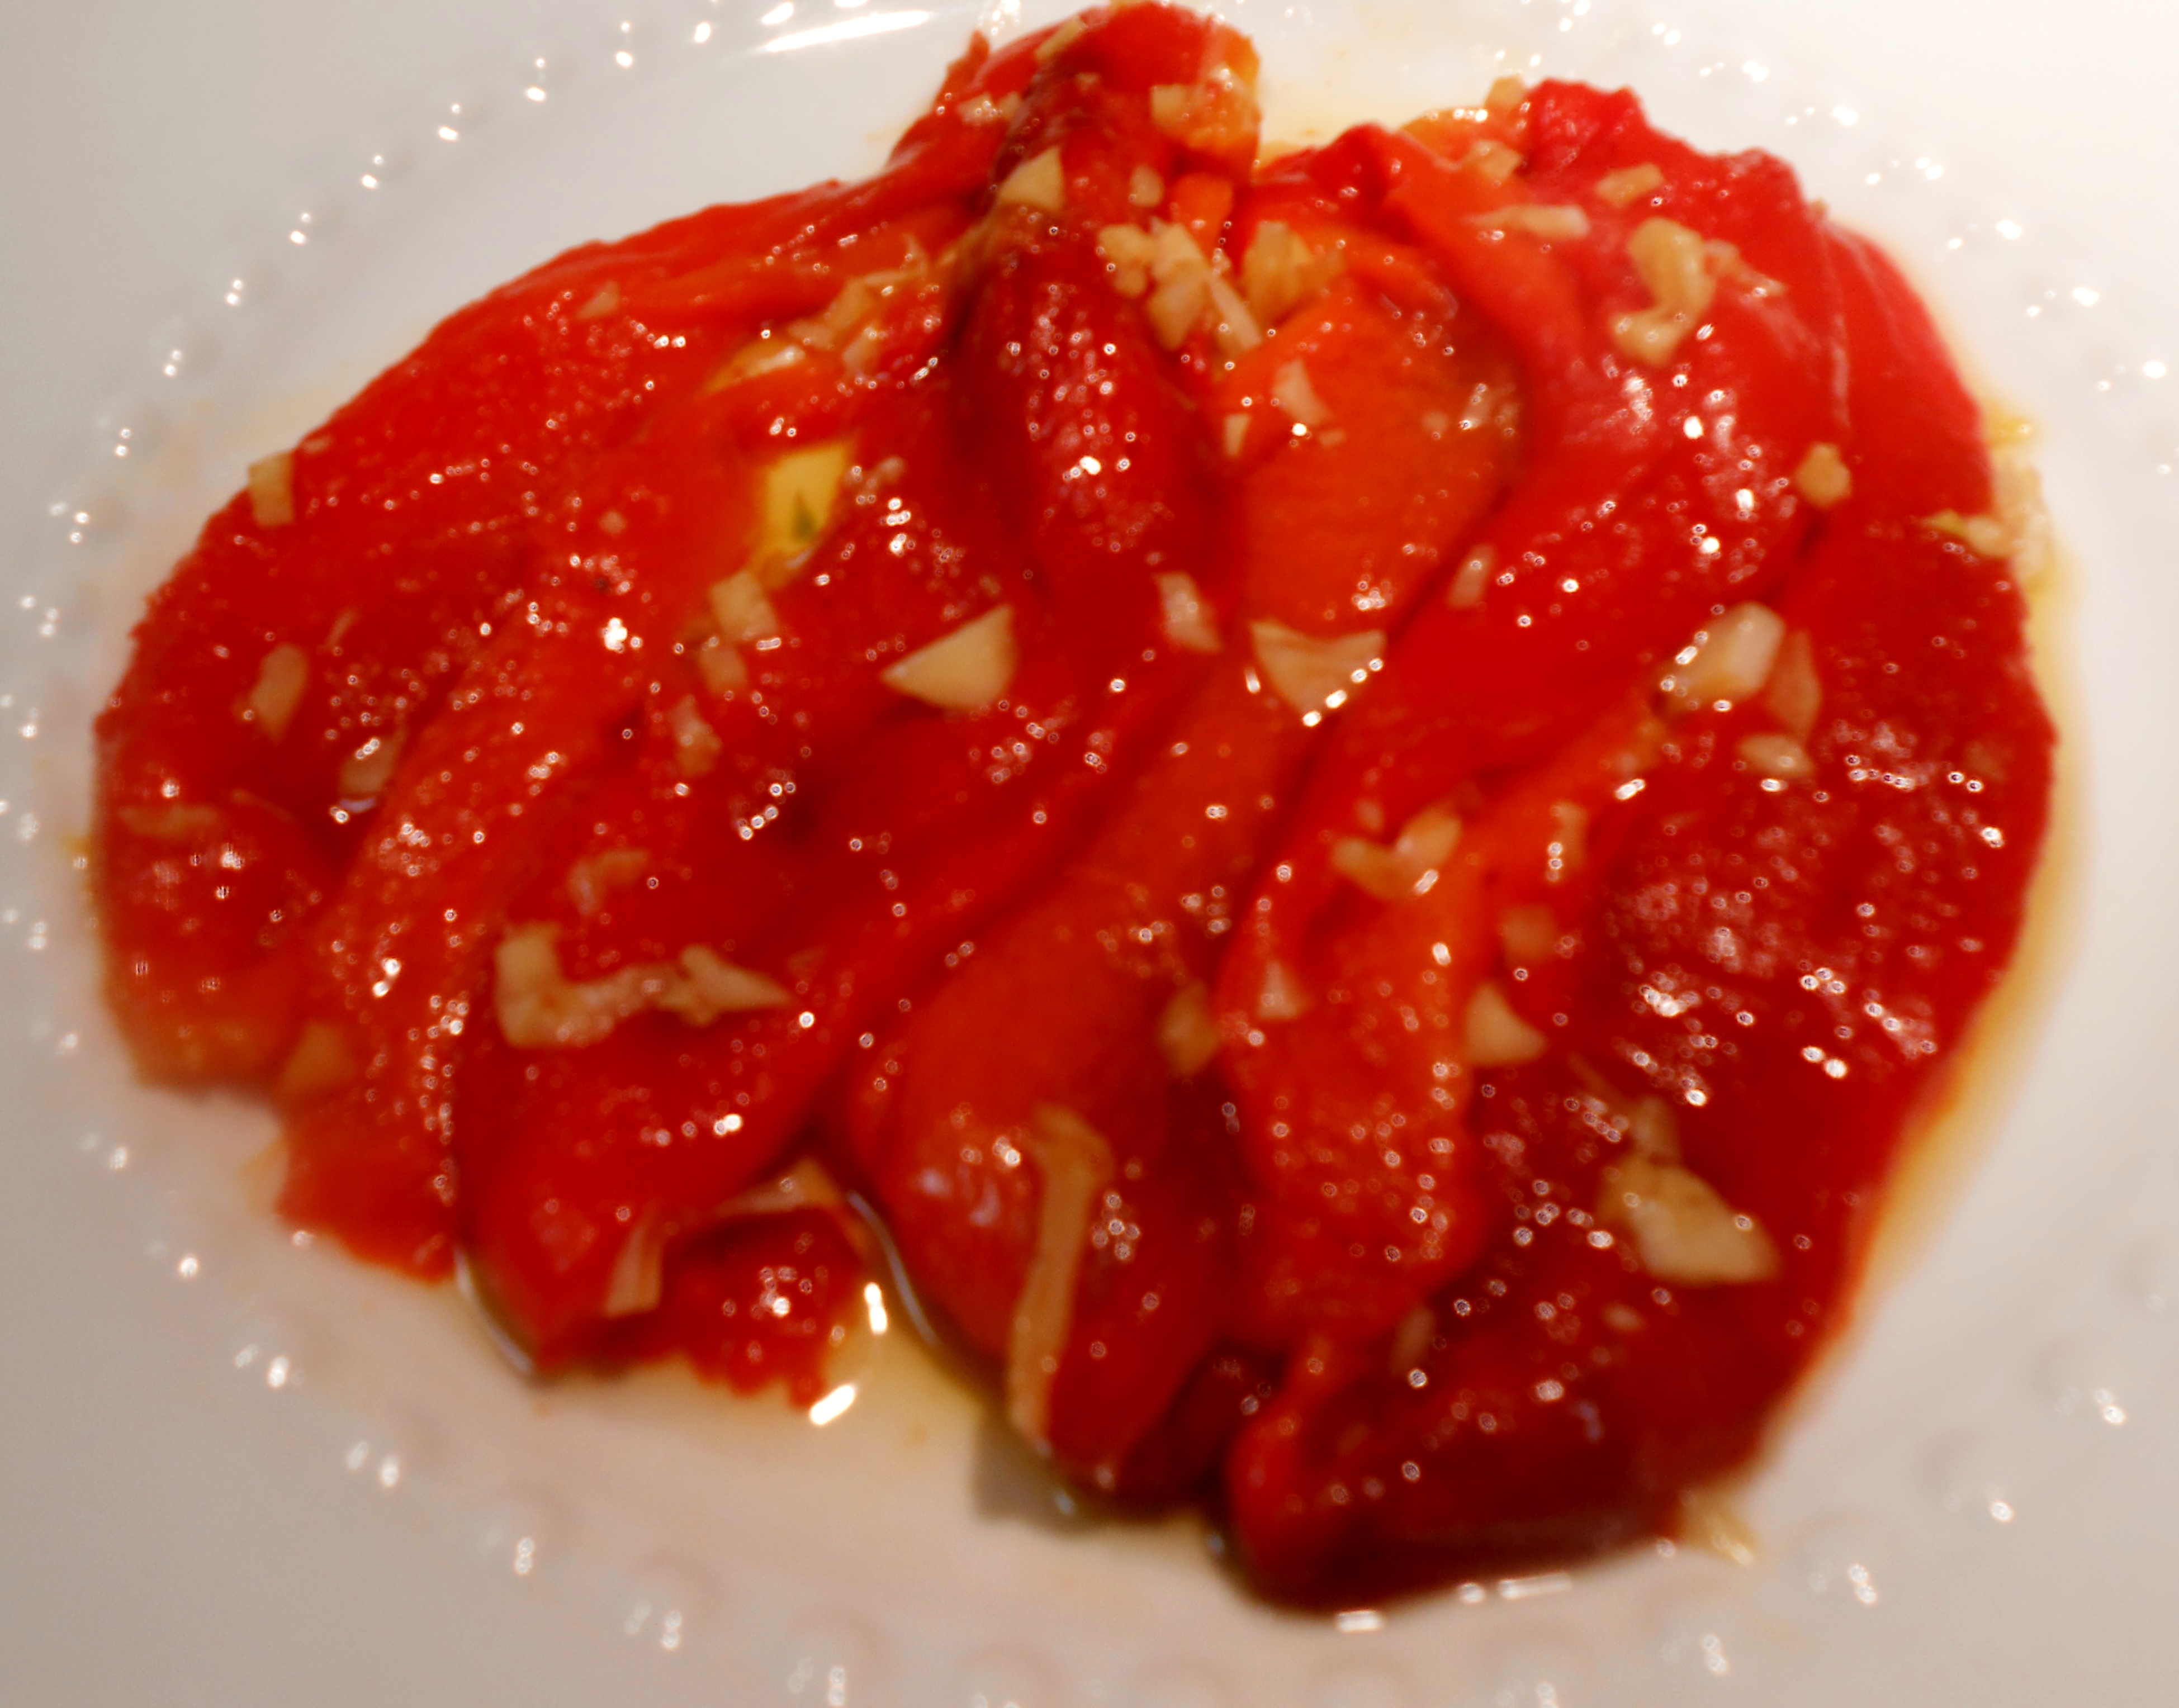
A friend from Avellino, Italy, taught me this years ago. This is a great technique if the peppers don’t have that sweet bold flavor roasting usually brings out. Sautéing the peppers after roasting imparts an even smoother flavor and garlic essence. The technique gives the peppers a hidden ingredient taste.
You will need:
Garlic cloves finely chopped (how many is personal preference)
Previously roasted red peppers, cut into long strips
Olive Oil
Once the peppers are stripped of core, seeds and skin; cut or rip them into long strips.
In a heavy bottomed fry pan, add 2 Tablespoons of olive oil.
Once warm, add 1 clove of finely chopped garlic per 2 peppers (or more if you love garlic).
Allow garlic to become translucent on a medium low flame.
Add the roasted red pepper strips to the pan, gently toss and coat. Allow to sauté for a minute or two.
Remove from heat. Eat immediately, or room temperature.
To store: use an airtight jar with a tight fitting lid. Place all of the peppers in the jar, drizzle a little extra virgin olive oil over the peppers, lid jar and place in fridge. These will keep for about a week.

“Roasted & Sauteed Red Peppers” by Liz Conforti, Forget What You Know About Wheat(c)2013
Recipes Using Roasted Peppers:

Frittata of Red Peppers & Provolone


Visit Kitchen Wisdom Gluten Free:
Facebook Pinterest Twitter Google+ Instagram Tumblr
BUY Kitchen Wisdom Gluten Free
Kitchen Wisdom Gluten Free: Journey into a Culinary Cultural Evolution &
Learn How to Transform Southern Italian Recipes to Gluten Free
Kindle Paperback
Kitchen Wisdom Gluten Free: Journey into a Culinary Cultural Evolution & Learn How to Transform Southern Italian Recipes to Gluten Free…Experience a Kitchen so Delicious, Those Who Can Eat Gluten Choose Not To! Available formats: eBook, & Paperback; On amazon.com, and at Select Vermont Retailers
