

These Kitchen Wisdom Gluten Free Crusty Olive Oil Rolls are so flavorful are delightfully crunchy and moist. They are actually dairy and gluten free, but your taste buds won’t believe it! I store them wrapped in wax paper in a plastic bag in the refrigerator or the freezer. They re-heat wonderfully at 400 degrees for a few minutes. Here’s the thing: you can actually eat these the next day without having to re-heat them first– and they are still moist! However, the heat of the oven is needed to re-new the crust’s hearty crunch. As many of you know, I often use mashed cannellini beans in my various dough recipes.
Gluten free baking requires attention to combinations of ingredients which maximize overall protein content of the baked good. The protein forms the basis for structure; although protein alone will not mimic the abilities of gluten and therefore additional ingredients need to be combined. The cannellini bean mash in this recipe provides bulk, protein and moisture. I also include Millet flour in the combination of dry ingredients. I have recently started using millet flour and let me tell you it is a wonderful ingredient. Millet flour creates a soft inner crumb and also provides bulk, protein and moisture. I However, there millet has a tipping point and too much will create a bitter taste in the final baked product. These incredibly moist and crusty olive oil rolls
The great thing is this recipe is also easy. To make the Crusty Olive Oil Rolls, I use my food processor to combine and knead together all of the ingredients. Then I quickly knead the dough into a ball and place it in a warmed prep bowl and set to rise. To get a lofty rise I add baking powder, guar gum for binding during lift, red wine vinegar and yeast. I use active dry yeast, the shelf life is incredible and it is the yeast in which many of us have in a jar sitting in the fridge for years. Active dry yeast must proof (or bloom) in water in order for the yeast to optimally work and rise in the recipe. Yeasted dough generally needs a warm place to proof. Proofing is the process which allows yeast to develop and ferment. Proofing occurs when yeast blooms in warm water and when the dough or bread is set to “rise”. Allowing the dough to “rise” is the fermentation rest period; this is when bread and dough get larger. The warm temperature increases the activity of the yeast resulting in increased carbon dioxide production which translates to a higher and faster rise. A dough proofer is a temperature and humidity controlled box where dough can set to rise in a warm and constant climate.
I do not have a proofer in my home kitchen, and I live in Vermont. To help keep dough warm while proofing I have had to get creative. During the cold months, it is so cold here the old school trick of leaving the dough to proof on the side of the stove doesn’t have a chance of working. The bowl I use for proofing is thick and non-metallic and I warm it in the microwave for 45 seconds. I remove the bowl and then run the microwave empty for one minute and keep the door closed. Once the bowl is prepped with olive oil and the dough is happily nesting and covered in a dishtowel; (keeping the microwave off) I place the bowl in the microwave, close the door and set my kitchen timer for 25 minutes. The dough is then nearly doubled in size. Since cold is a dough retarder, if this dough is cold, it will not yield a quality rise.
Yields 6-8 rolls
1/3 cup + 2 tablespoons gluten free White Rice Flour
½ cup gluten free Potato Starch
½ cup gluten free Tapioca Starch
2 tablespoons gluten free Sorghum Flour
1/3 cup gluten free Millet Flour
3 teaspoons gluten free Baking Powder
1 teaspoon gluten free Guar Gum
½ cup Cannellini Bean mash
2 teaspoons Red Wine Vinegar
3 tablespoons + 2 teaspoons Olive Oil
¾ teaspoon Salt
2 teaspoons Active Dry Yeast
Pinch Sugar
¾ – 1 cup warm water
1 Egg (egg wash is an optional coating for baking)
Prep the Cannellini Beans: Using a fork, mash ½ cup of beans in a small bowl and set aside.
Proof the Yeast: Warm the water, place ½ cup warm water, pinch of sugar and yeast in a separate bowl. Allow the yeast to bloom.
Make the Dough: Combine white rice flour, potato starch, tapioca starch, sorghum, millet flour, baking powder, guar gum and salt in the bowl of a food processor. Pulse in the cannellini bean mash in two additions. Pulse in 3 tablespoons of olive oil. Gradually pulse in the proofed yeast water. Then gradually add ¼ – ½ cup additional warm water – a tablespoon or two at a time. If the dough is too sticky, pulse in a bit of white rice flour.

Proof the Dough: Warm a thick, non- metallic bowl in the microwave for about 45 seconds. Pour in 2 teaspoons of olive oil and tilt bowl to coat the inside. Take the dough out of the food processor; knead a few times to shape dough into a ball. Place the ball into the bowl and turn it a bit and thoroughly coat the dough with olive oil. You may need to a drizzle a bit more oil to fully coat. Place plastic wrap or wax paper on top of the dough and cover the bowl with a clean dishtowel. Proof and allow dough to rise for 25 minutes in a warm area (like next to the stove).
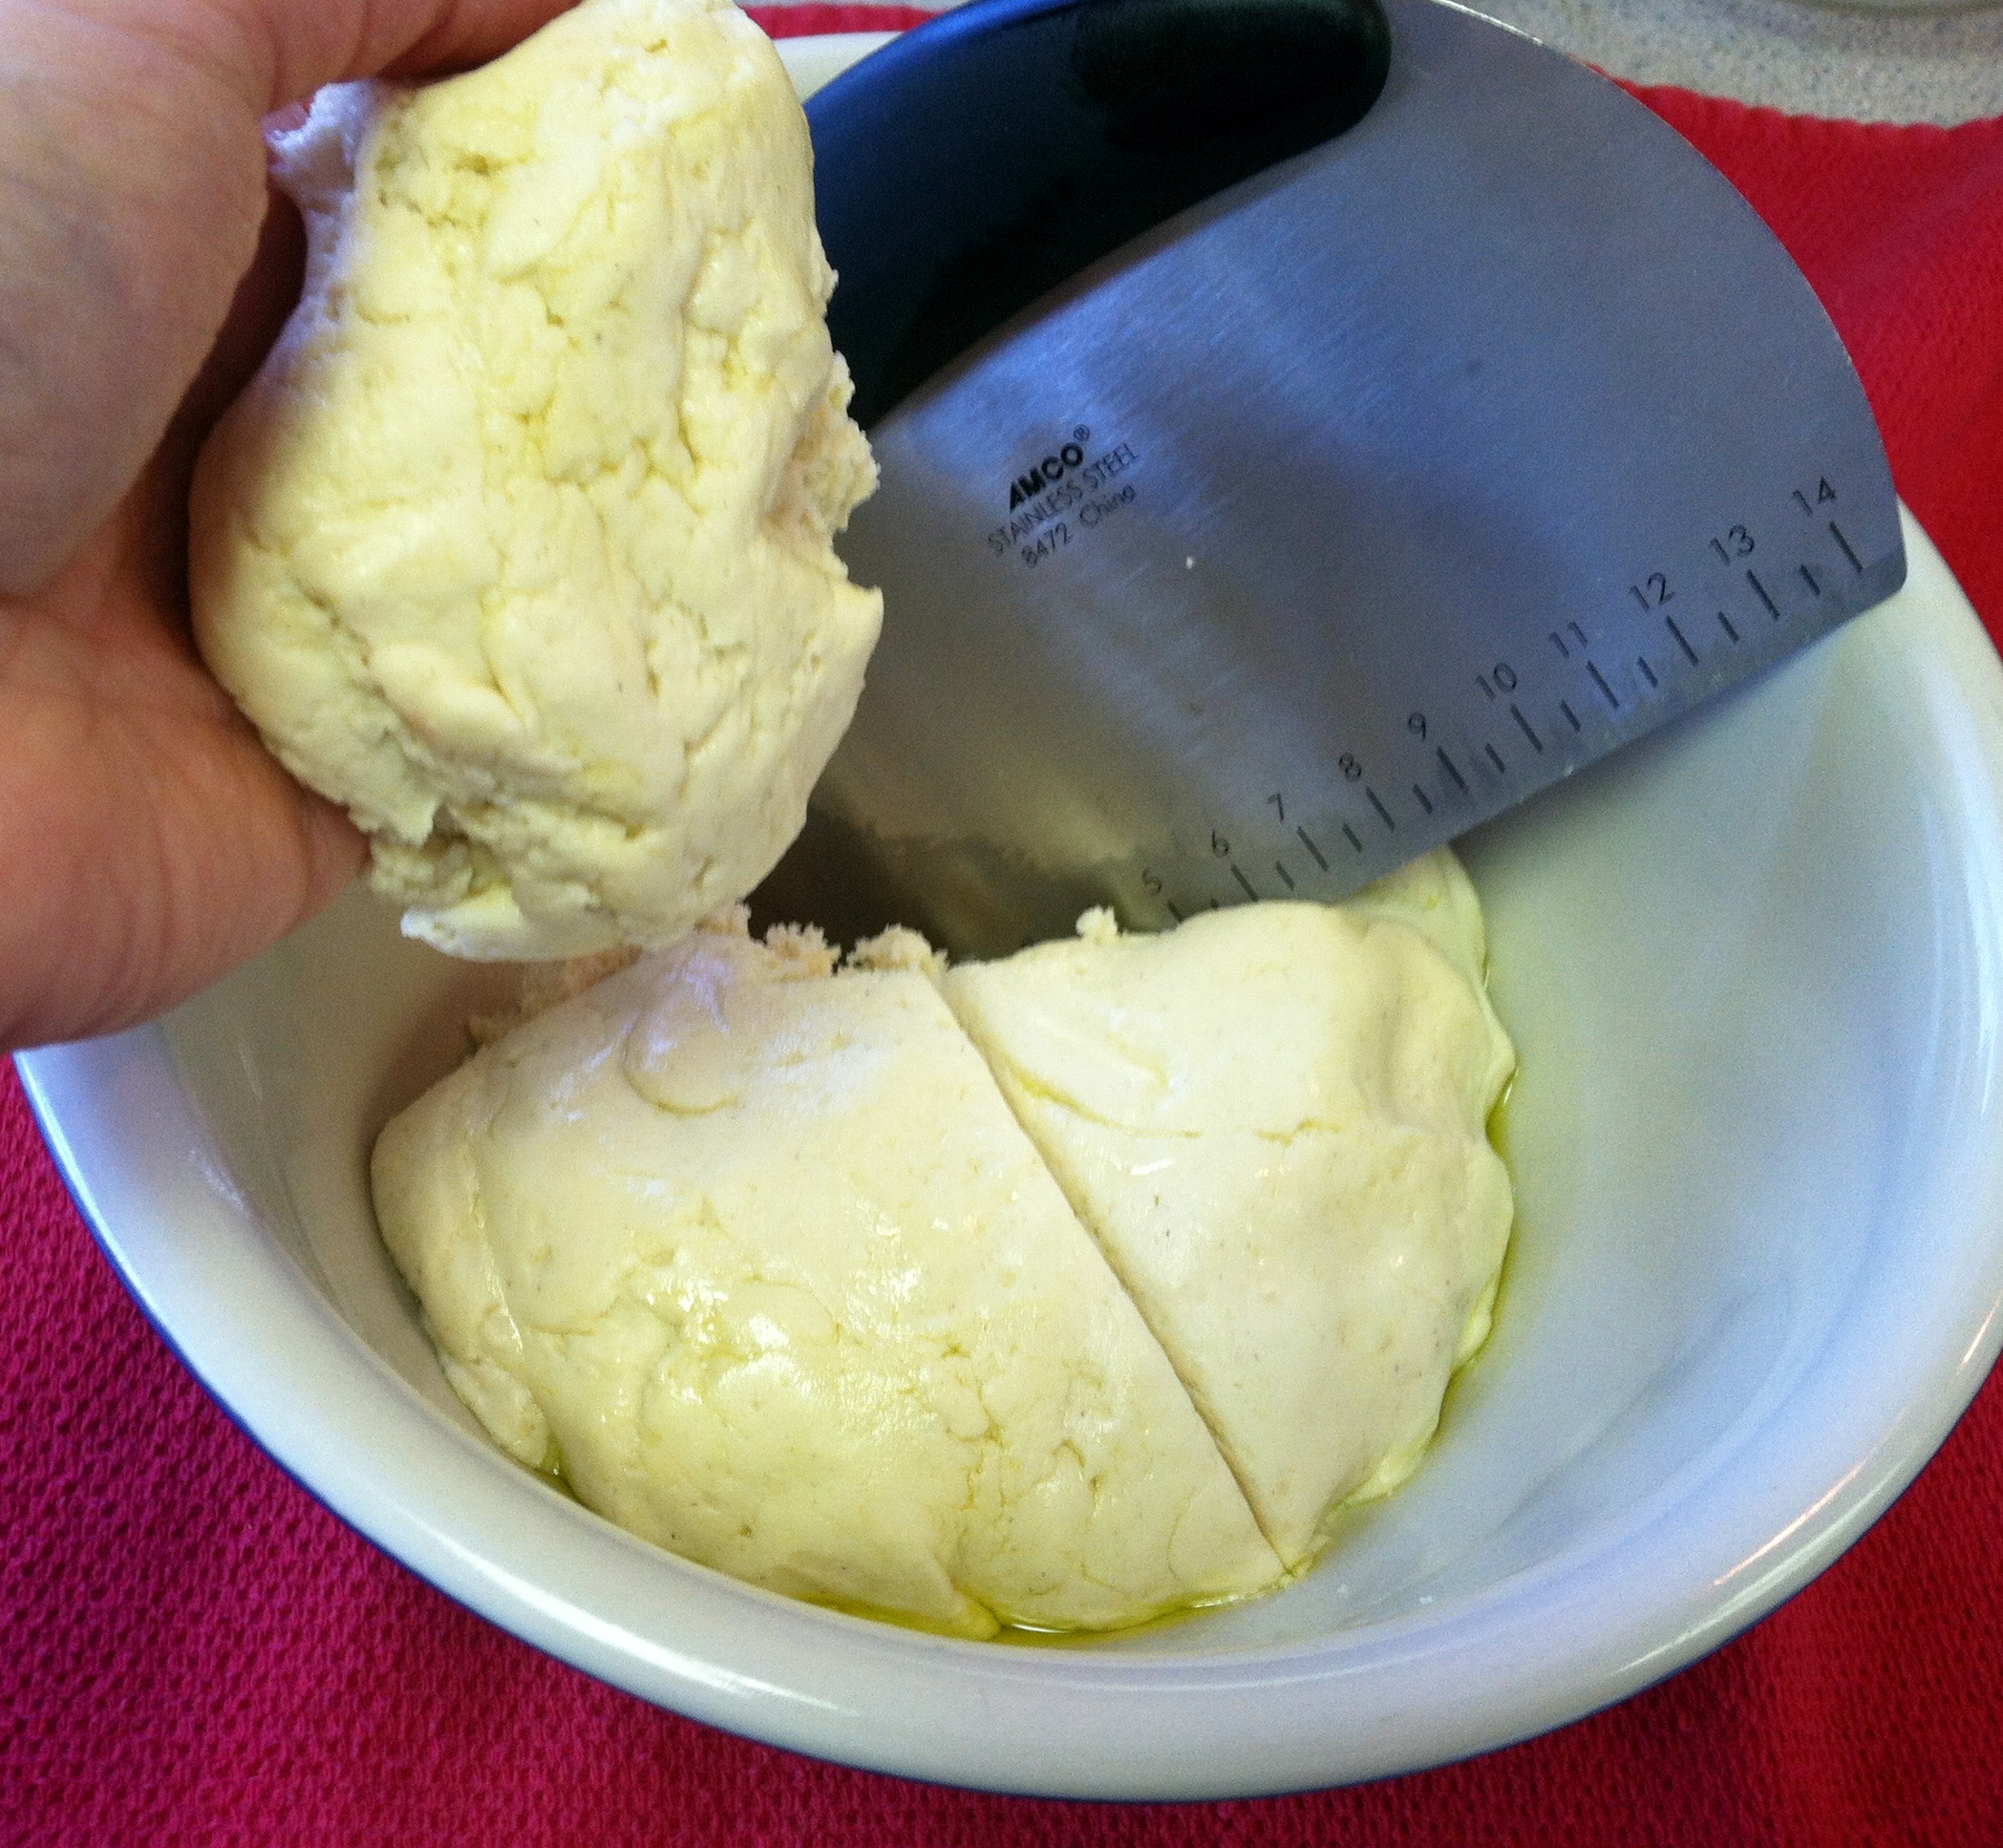
Prep & Shape: Pre-heat the oven to 450 degrees. Beat an egg in a small bowl and set aside. Place a long sheet of wax paper on the counter and cut a second sheet and place aside. Using a dough blade, cut the dough in 4 – 6 inch pieces. Roll the dough in your palms, the shape by gently rolling the edges downward. Slightly flatten the top.
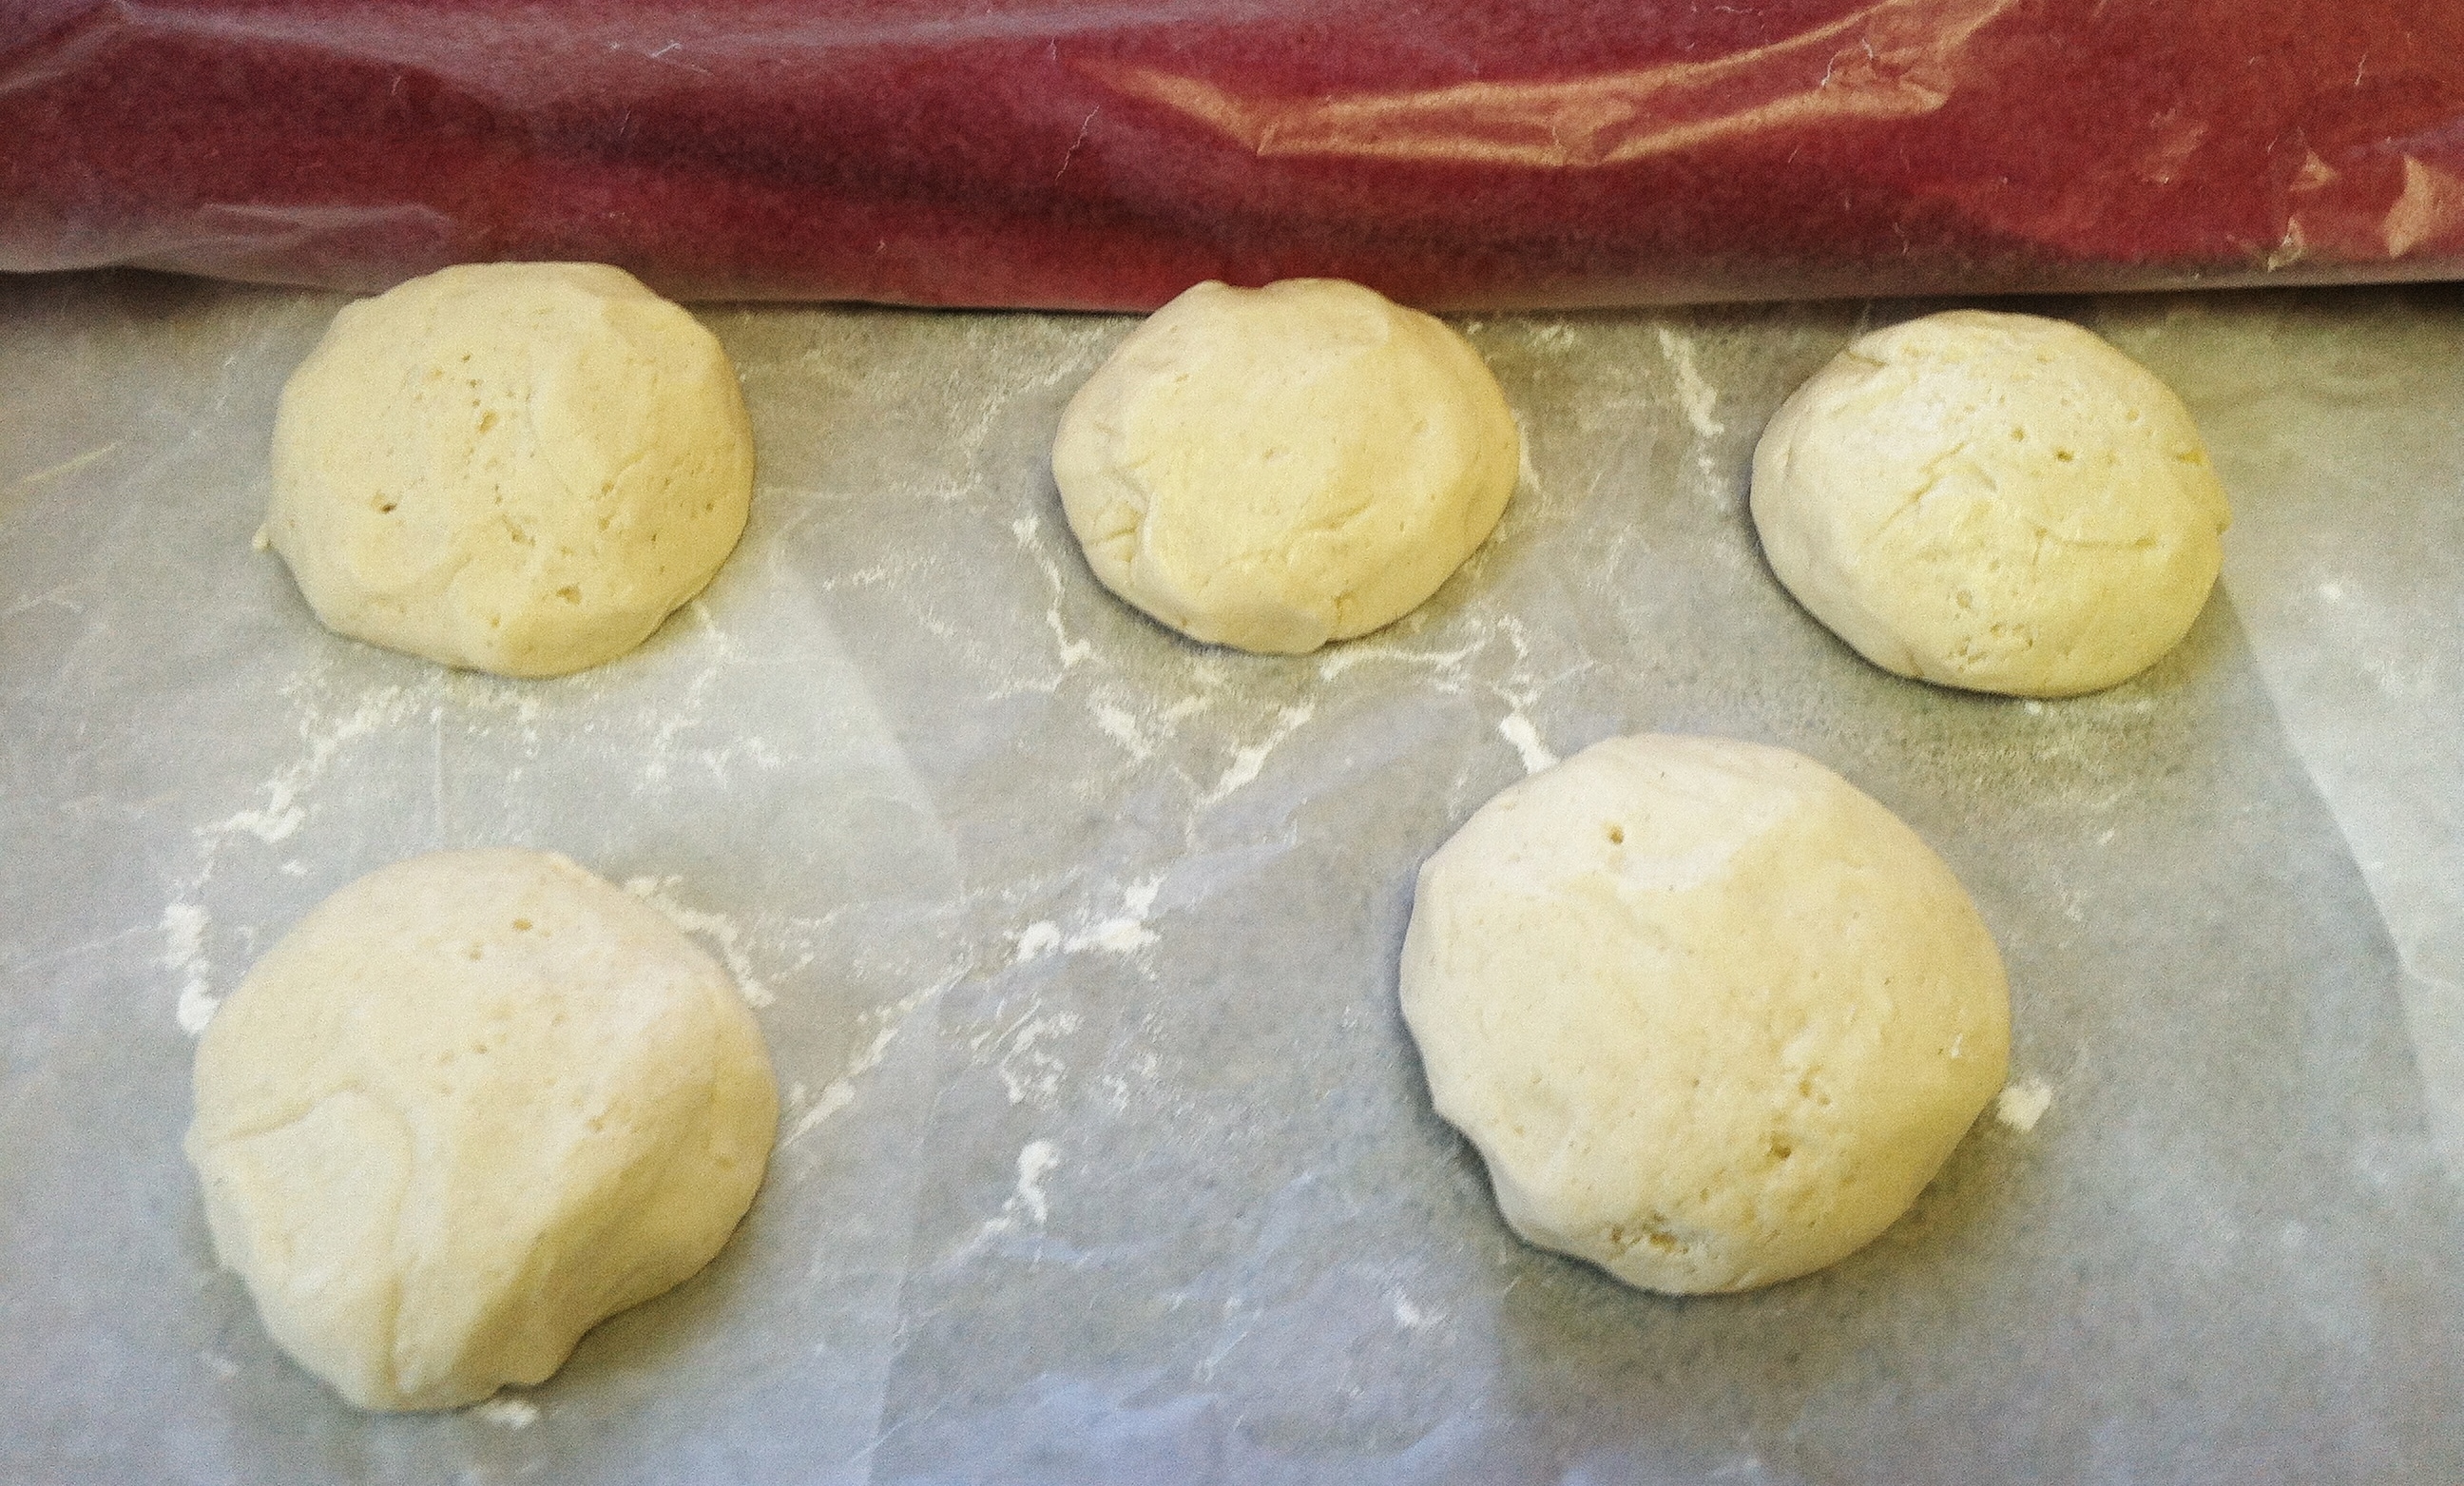
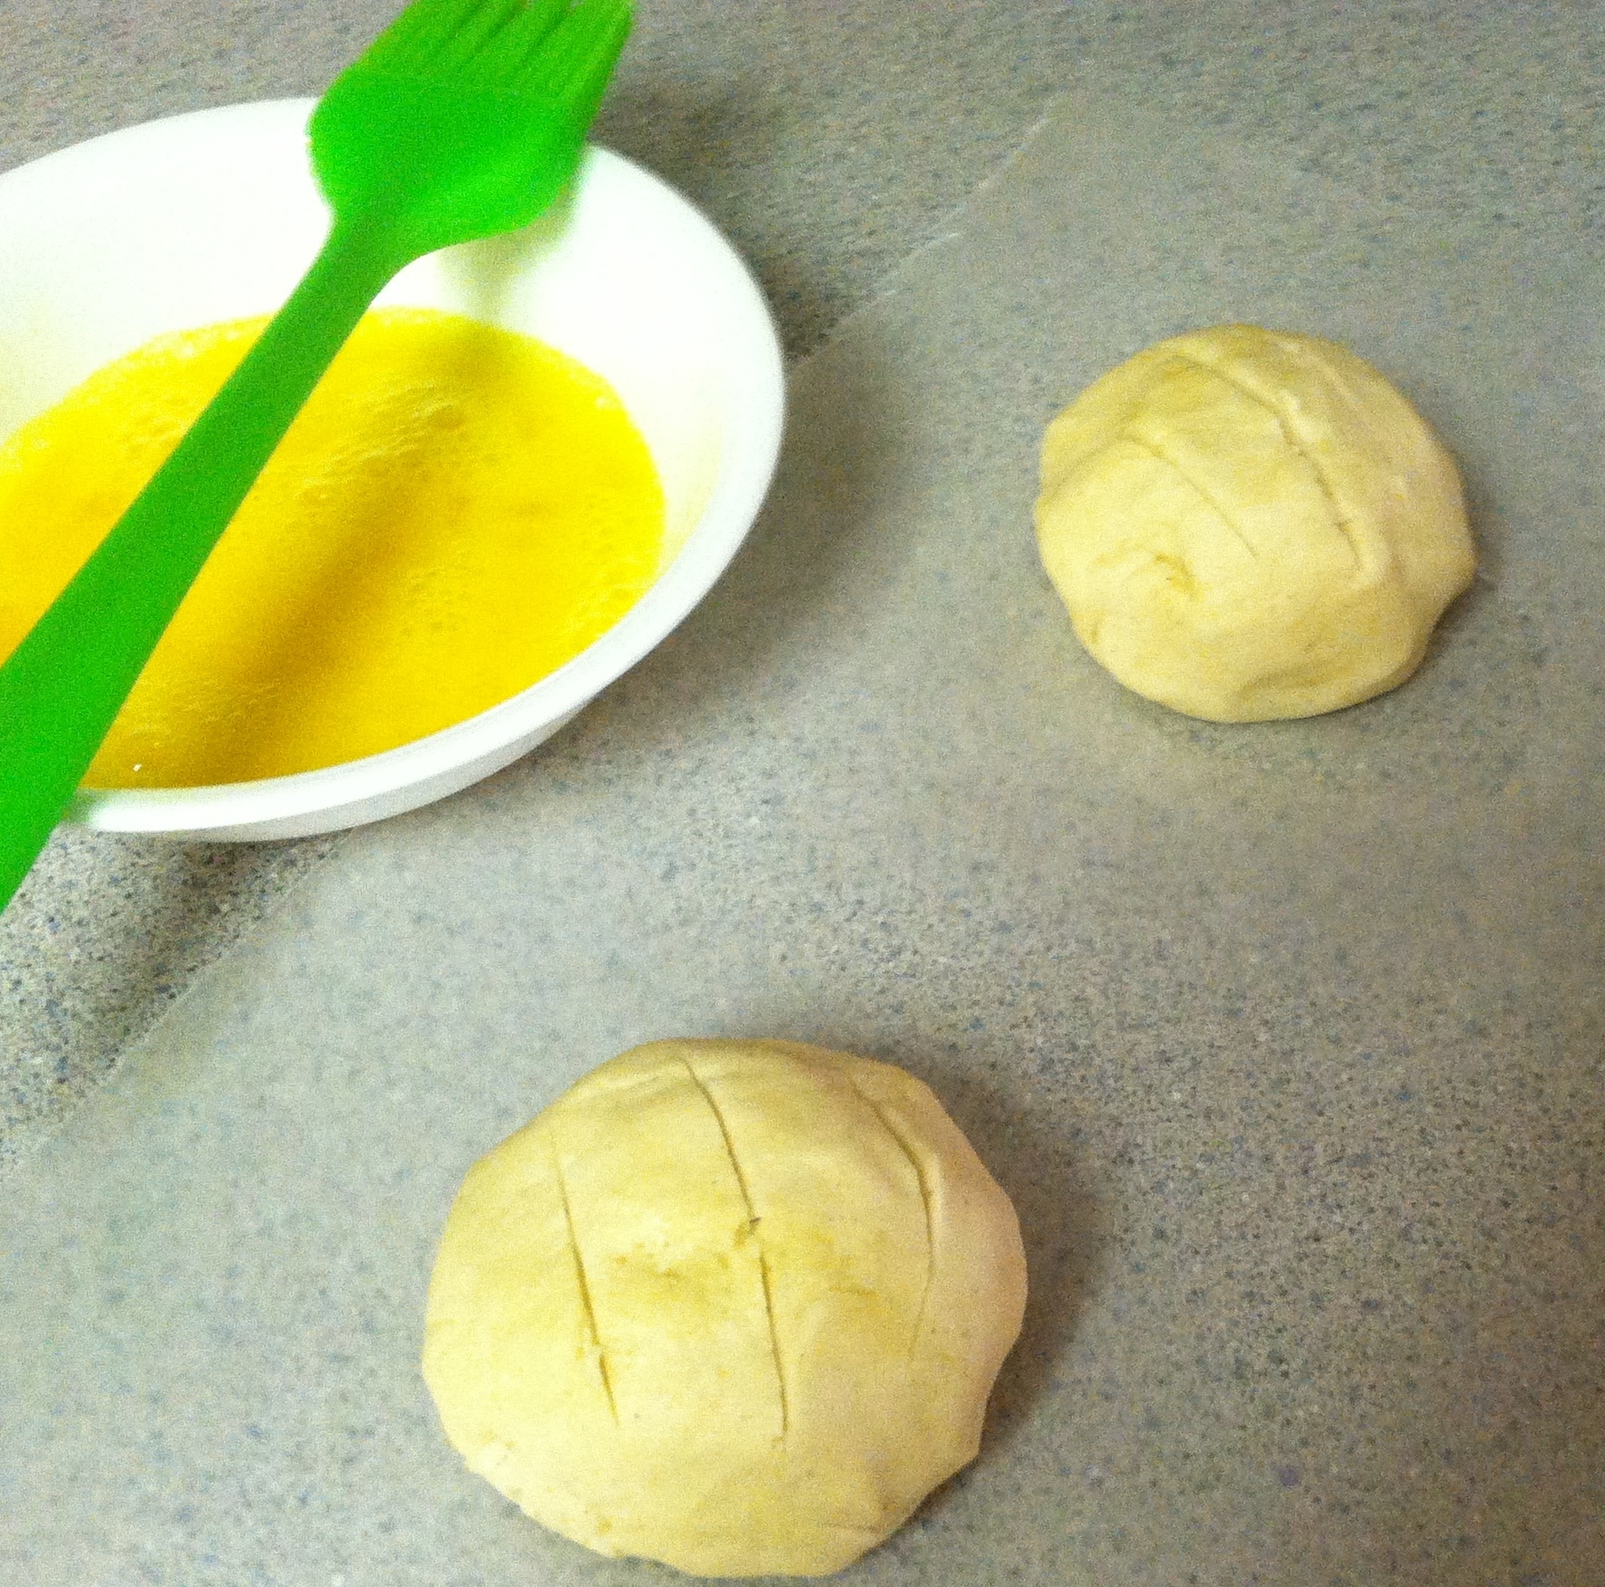
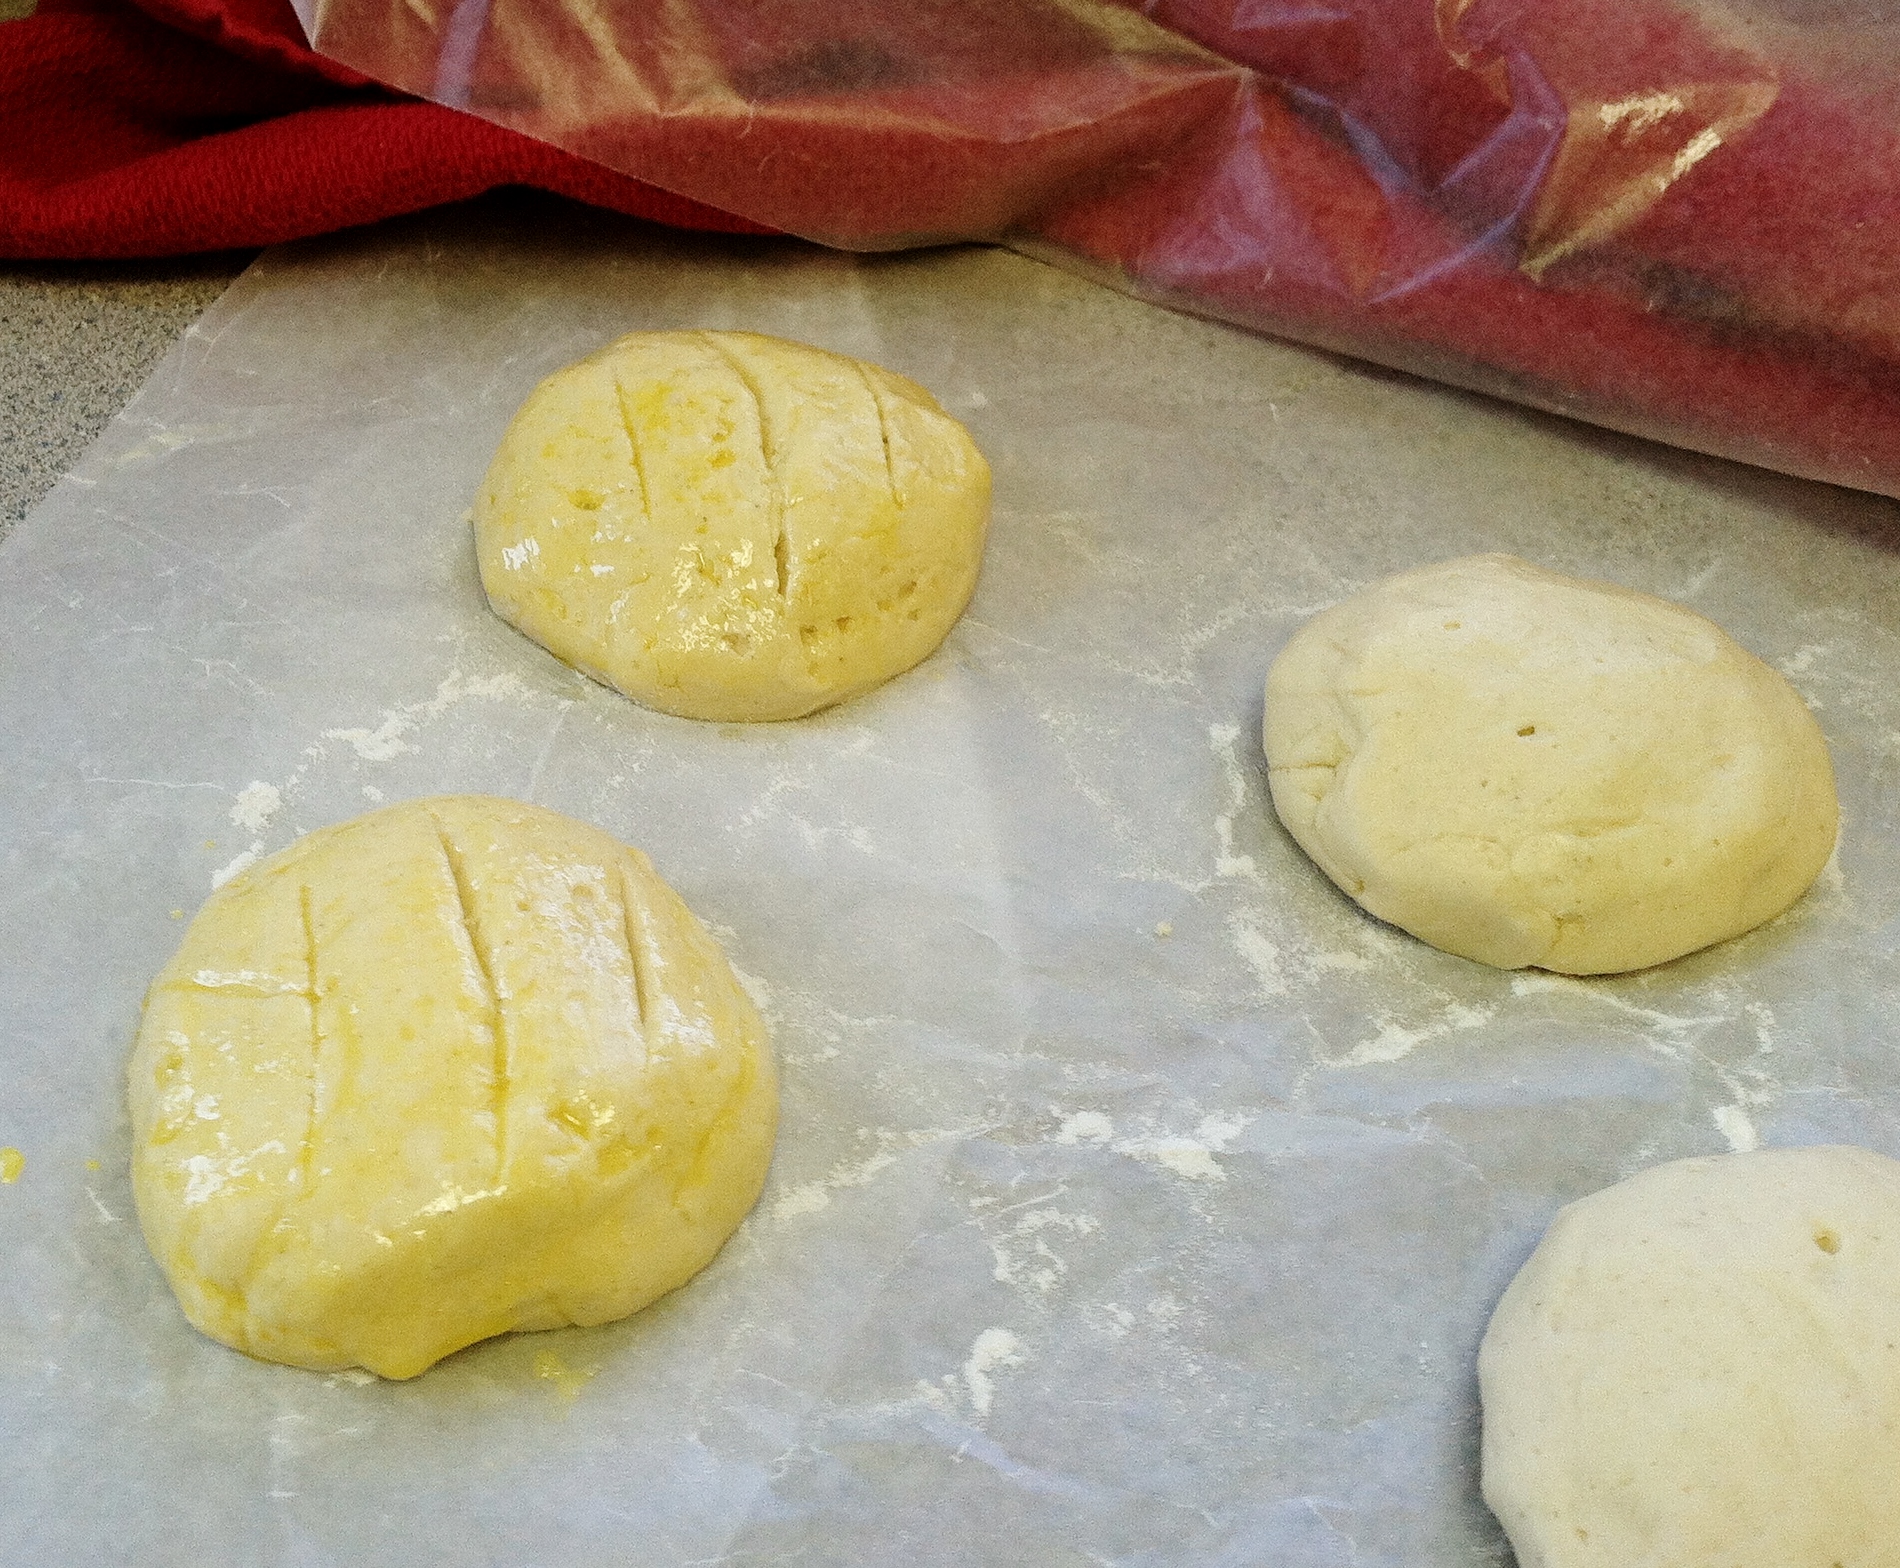
Place on wax paper, loosely cover with the additional sheet of wax paper and allow the dough to rest for 5 minutes. Do not over rest the rolls (they will bubble and require a quick kneading, then re-shape and bake). Score the top of each roll with a sharp knife, making 3 brief slits. brush the egg wash on the rolls to be immediately baked and completely cover all exposed baking area. Place directly on a pizza stone or on a baking sheet. Bake for 18 minutes. Remove to cooling rack. Eat hot, warm or room temperature. Store in fridge or freezer wrapped in a wax paper lined plastic bag. Re-heat on 400 degrees to warm and renew crunch of crust. Bake 5-10 minutes for re-heat.

“Crusty Olive Oil Rolls” by Liz Conforti, Forget What You Know About Wheat(c) 2015
Serve with Kitchen Wisdom Gluten Free

Visit Kitchen Wisdom Gluten Free:
Facebook Pinterest Twitter Google+ Instagram Tumblr
BUY Kitchen Wisdom Gluten Free
Kitchen Wisdom Gluten Free: Journey into a Culinary Cultural Evolution &
Learn How to Transform Southern Italian Recipes to Gluten Free
Kindle Paperback 
Kitchen Wisdom Gluten Free: Journey into a Culinary Cultural Evolution & Learn How to Transform Southern Italian Recipes to Gluten Free…Experience a Kitchen so Delicious, Those Who Can Eat Gluten Choose Not To! Available formats: eBook, & Paperback; On amazon.com, and at Select Vermont Retailers.
